Midjourney has quietly become the fastest way to turn a sentence into a usable image. For DevOps and security pros that sounds off topic, until you remember how much of career growth runs on visuals. Architecture concepts that do not look like clip art. Slide decks that hold a room. A LinkedIn presence that actually gets clicks. A conference talk that looks like you spent money on it. This Midjourney tutorial shows you how to be productive without burning hours or budget.
What Midjourney Actually Is
Midjourney is a text to image generator. You describe what you want, it renders four options, you refine. As of June 2026 the default model is V8.1, which renders standard images in roughly four seconds and native HD in about twelve. It reads prompts more literally than older versions, holds small details better, and renders text far more reliably, which matters when you want a label or a title baked into an image. A newer V8.2 is in preview behind the --preview flag if you want to test where the aesthetics are heading.
You no longer need Discord. The web app at midjourney.com/imagine is the main way to work now, with a prompt bar, a gallery, and an editor. The Discord bot still works if you like it, but the web app is faster for most people.
Quick Setup
Getting from zero to your first image takes about five minutes.
- Go to midjourney.com, sign in with Google or Discord, and pick a plan. The Basic plan is 10 dollars a month and is plenty to evaluate the tool.
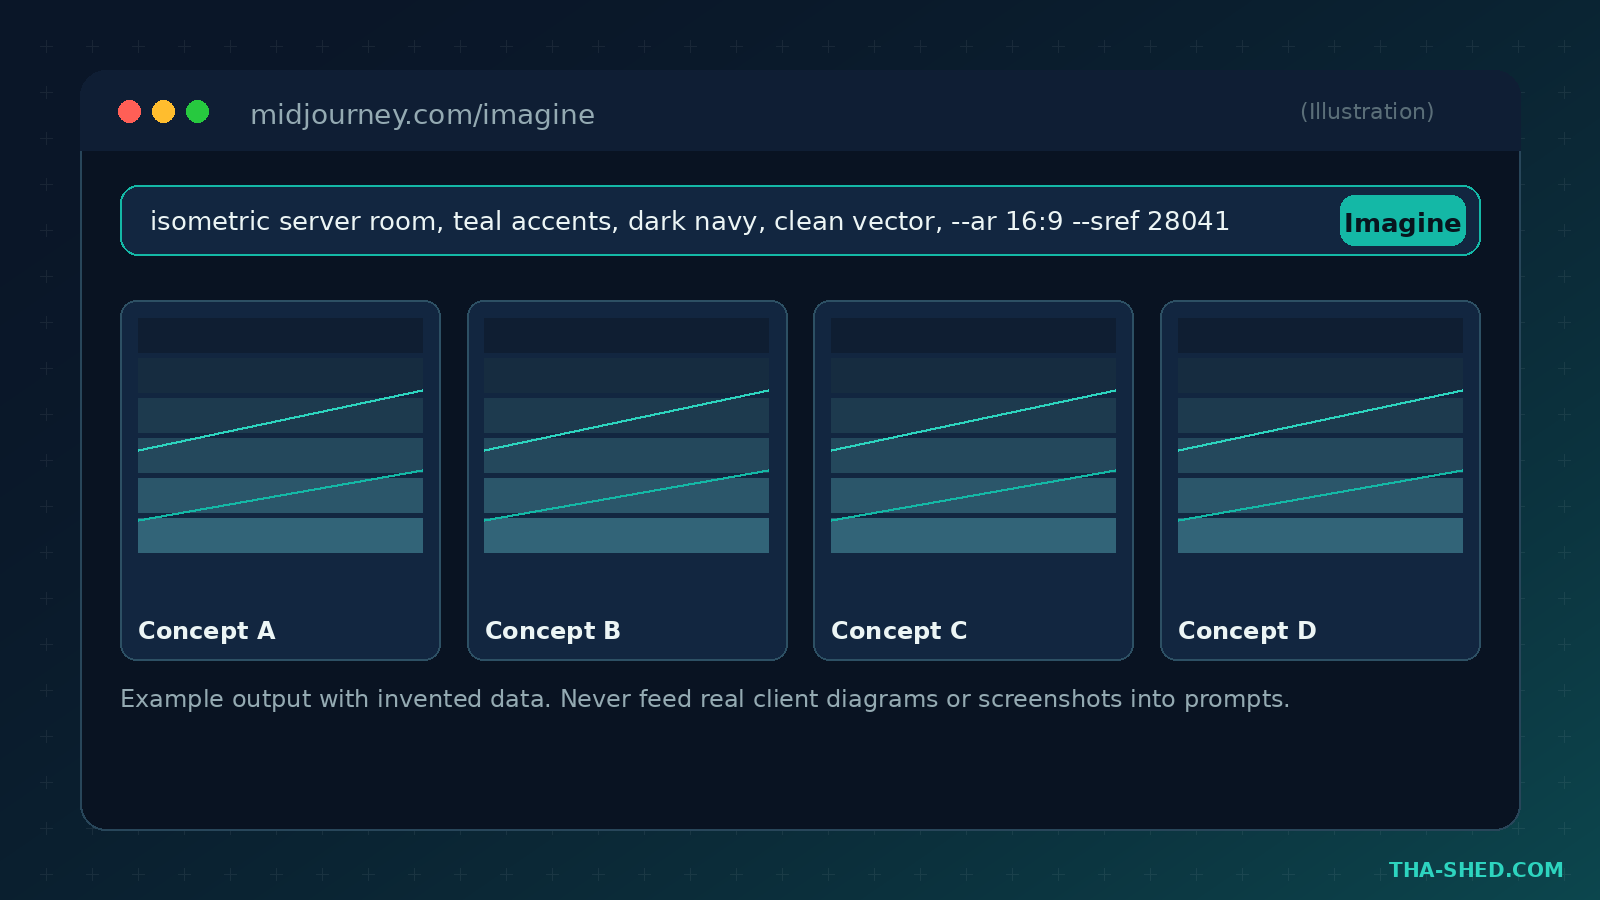
- Open the Imagine page. Type a description in the prompt bar and press enter.
- Wait a few seconds for a grid of four. Click any one to upscale, vary, or open it in the editor.
- Turn on Draft Mode from the prompt settings before you start exploring. More on why below.
The official Getting Started guide covers account setup and the editor in detail.
The One Principle: Iterate Cheap, Commit Expensive
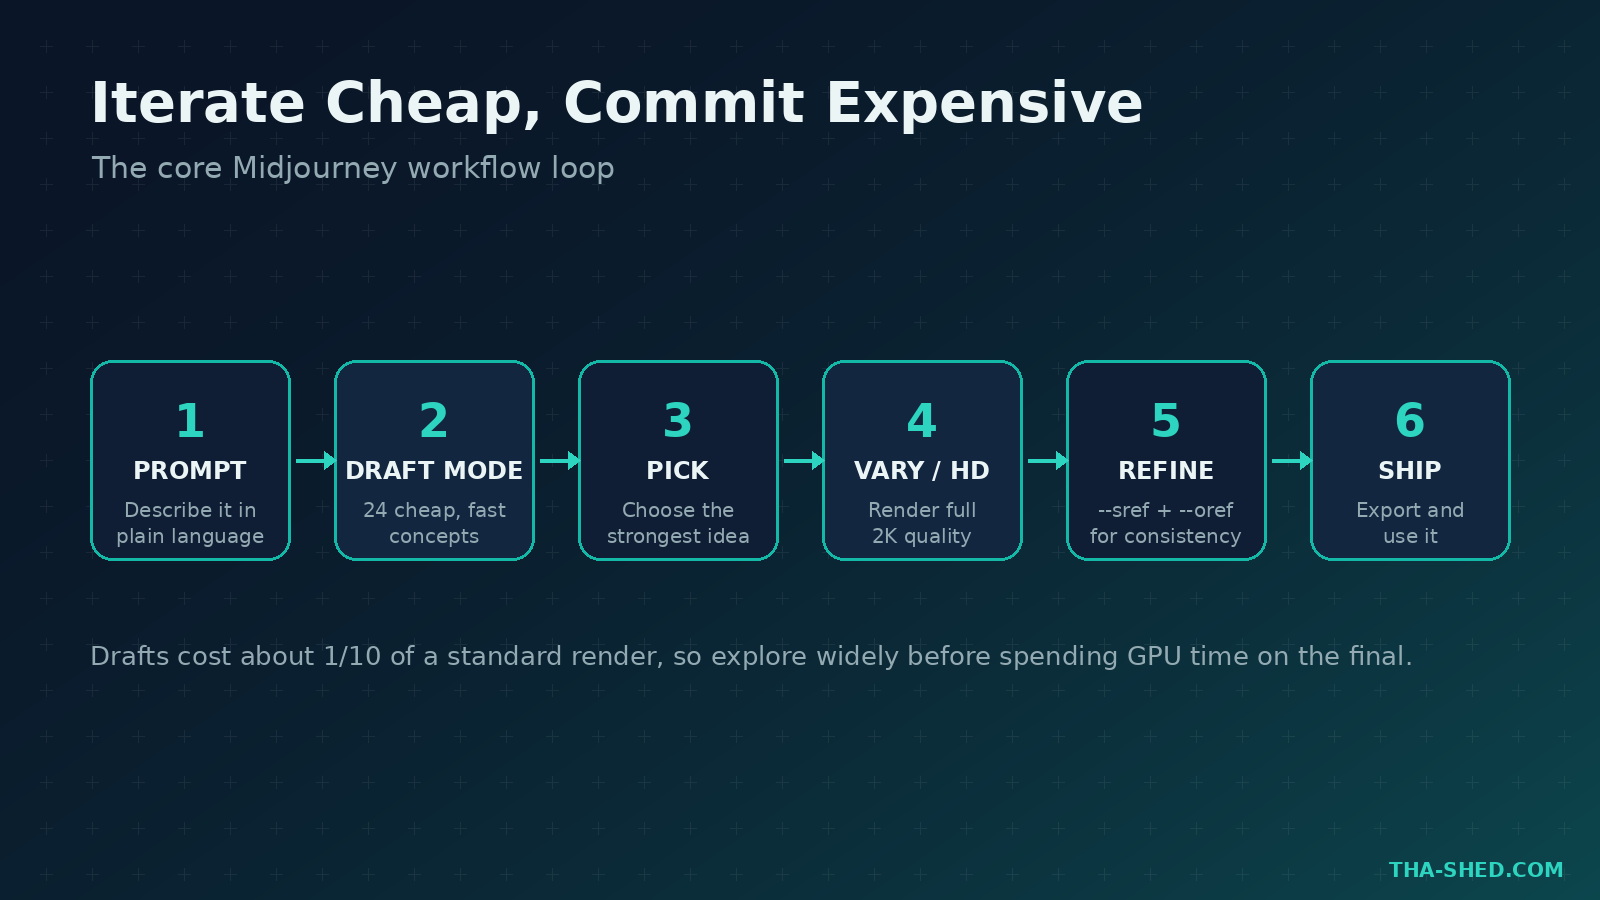
The single mindset that makes Midjourney productive instead of a time sink is this: explore in Draft Mode, then commit GPU time only to the winners. Draft Mode renders a big batch of lower quality concepts at roughly one tenth the cost and several times the speed of a standard generation. You are not trying to nail the final image on prompt one. You are running cheap experiments to find a direction, then clicking Vary on the one that works to render it at full 2K quality.
Think of it like infra. You do not provision production to test an idea. You spin up something small and cheap, prove it out, then scale the thing that works.
7 Midjourney Workflows for Tech Pros
1. Blog and article hero images
Every technical post reads better with a clean header. Lock a look and reuse it. Example prompt: isometric data center, dark navy and teal palette, clean vector style, soft glow, no text --ar 16:9. Add --style raw when you want less of Midjourney’s default polish and more literal control.
2. Slide deck backgrounds and section dividers
Generate abstract backgrounds and divider art so your decks stop looking like the default template. Example: abstract network mesh, deep navy gradient, subtle teal nodes, lots of negative space for text --ar 16:9. The negative space cue gives you room to drop a title on top.
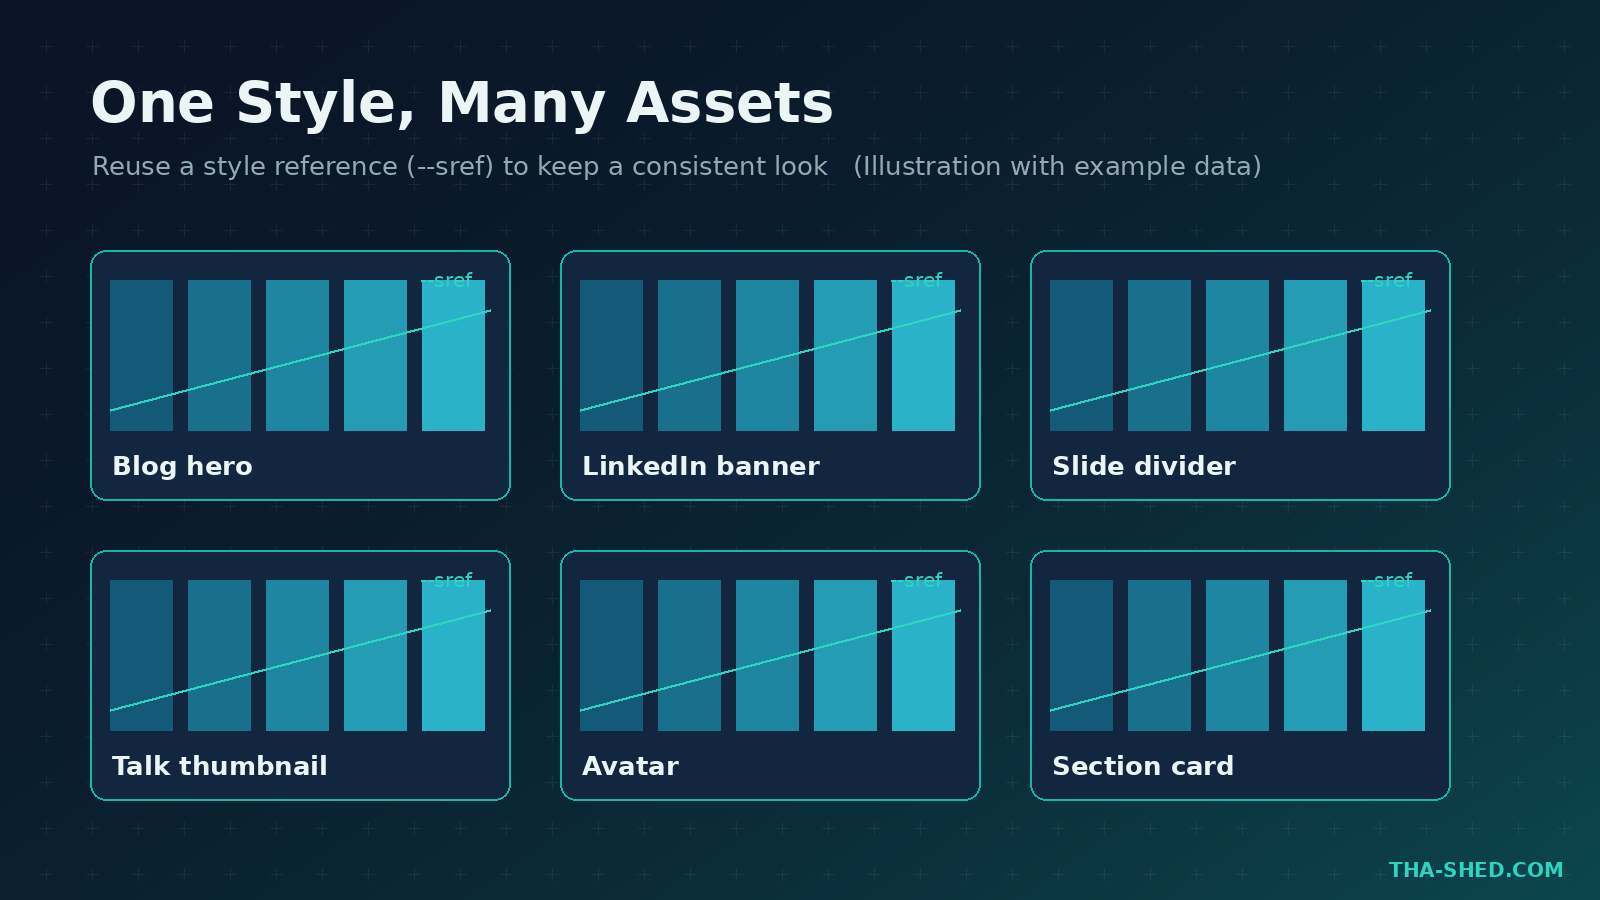
3. A consistent personal brand kit
Pick one style and pin it across every asset using the style reference flag. Generate one image you love, then reuse its style code with --sref on future prompts so your blog hero, LinkedIn banner, and talk thumbnails all match. Personalization, trained on images you rate, pushes results toward your taste over time.
4. Concept art for architecture and threat models
Be honest about the limits here. Midjourney will not draw an accurate network topology or a correct data flow. Use it for the cover concept and the mood, not the technical truth. Example: isometric illustration of a zero trust security perimeter, glowing teal shields, dark background, conceptual not technical --ar 3:2. For diagrams that must be exact, stick with diagrams as code or a real diagramming tool, then let Midjourney handle the hero image.
5. Social content for career visibility
Consistent visuals are how technical creators grow an audience. Batch a month of post graphics in one session using the repeat feature, then schedule them. If monetizing your expertise is the goal, pair this with our Social Media Monetization Coach to turn visibility into income.
6. Quick UI and product concept mockups
When you are pitching an internal tool or a side project, a rough mockup sells the idea faster than a paragraph. Example: clean dashboard UI concept, dark mode, teal accent charts, generic placeholder data, flat design --ar 16:9. Always label these clearly as concepts so nobody mistakes them for a real product.
7. Icons, textures, and backgrounds at scale
Use permutation prompts to generate variations in one shot, for example a set of related spot illustrations with a shared style. Example: flat line icon of a {server, lock, cloud, pipeline}, teal on dark navy, consistent stroke width. One prompt, four matching icons.
Safety and Gotchas
The privacy rule comes first. Never feed confidential screenshots, client diagrams, proprietary architecture, or any sensitive data into a prompt or as an image reference. On the Basic and Standard plans your generations are public in the Midjourney gallery by default. Stealth Mode, which keeps your work private, is only on the Pro and Mega plans.
A few more traps to avoid:
- It is not a diagram tool. Treat any technical content in an image as decorative, not authoritative. Proofread baked in text even though V8.1 renders it well.
- Licensing. Do not generate copyrighted characters or trademarked logos for anything you publish. If your company makes over 1,000,000 dollars in gross revenue per year, the Terms of Service require the Pro or Mega plan.
- Style drift and artifacts. Faces, hands, and fine symmetry can still go wrong. Review before you ship.
Usage and Cost Tips
Midjourney bills by GPU time, so a little discipline goes a long way.
- Live in Draft Mode while exploring. It is roughly ten times cheaper than standard renders, so most of your iterations should happen there.
- On the Standard plan and above, Relax Mode gives unlimited image generations that do not eat your Fast GPU hours. Use Fast for finals, Relax for everything else.
- Annual billing is 20 percent cheaper than paying monthly.
- You can earn free Fast GPU time by rating images in the gallery.
- Start on Basic at 10 dollars a month to learn the tool, then move to Standard at 30 dollars a month once you want unlimited Relax. Full details are on the plan comparison page.
FAQ
Do I need Discord to use Midjourney?
No. The web app at midjourney.com is the primary interface now and is faster for most people. Discord still works if you prefer it, but it is optional.
Can I use Midjourney images commercially?
Yes, with an active or past paid subscription you can use your images in almost any way you want. The one catch is that companies earning more than 1,000,000 dollars in gross revenue per year must be on the Pro or Mega plan. Check the current Terms of Service before publishing.
Which plan should a solo professional pick?
Start on Basic to evaluate it. Standard is the sweet spot for most individuals because it adds unlimited Relax Mode image generation. Step up to Pro only if you need Stealth Mode to keep your work private.
Start Building Your Visual Toolkit
Midjourney will not replace your diagramming tool or your design team, but it will make you noticeably faster at every visual that supports your work and your career. Turn on Draft Mode, lock a style with --sref, and batch your assets. If you want a structured path to level up your DevOps, security, and AI skills alongside this, browse our courses and keep building. For more tool tutorials in this series, see our Claude Code tutorial.